Step by Step configuring a device using the builtin IDE
The configuration of HomeDing based devices is based on 2 files located in the filesystem: env.json, config.json. They can be changed by using the built-in editor.
The built-in micro IDE that assists in modifying the “env.json”, “config.json” and other text based files.
For JSON files there is a special support for syntax validating.
Starting the IDE
The IDE can be found on all the HomeDing based devices using the url http://homeding/microide.htm [1].
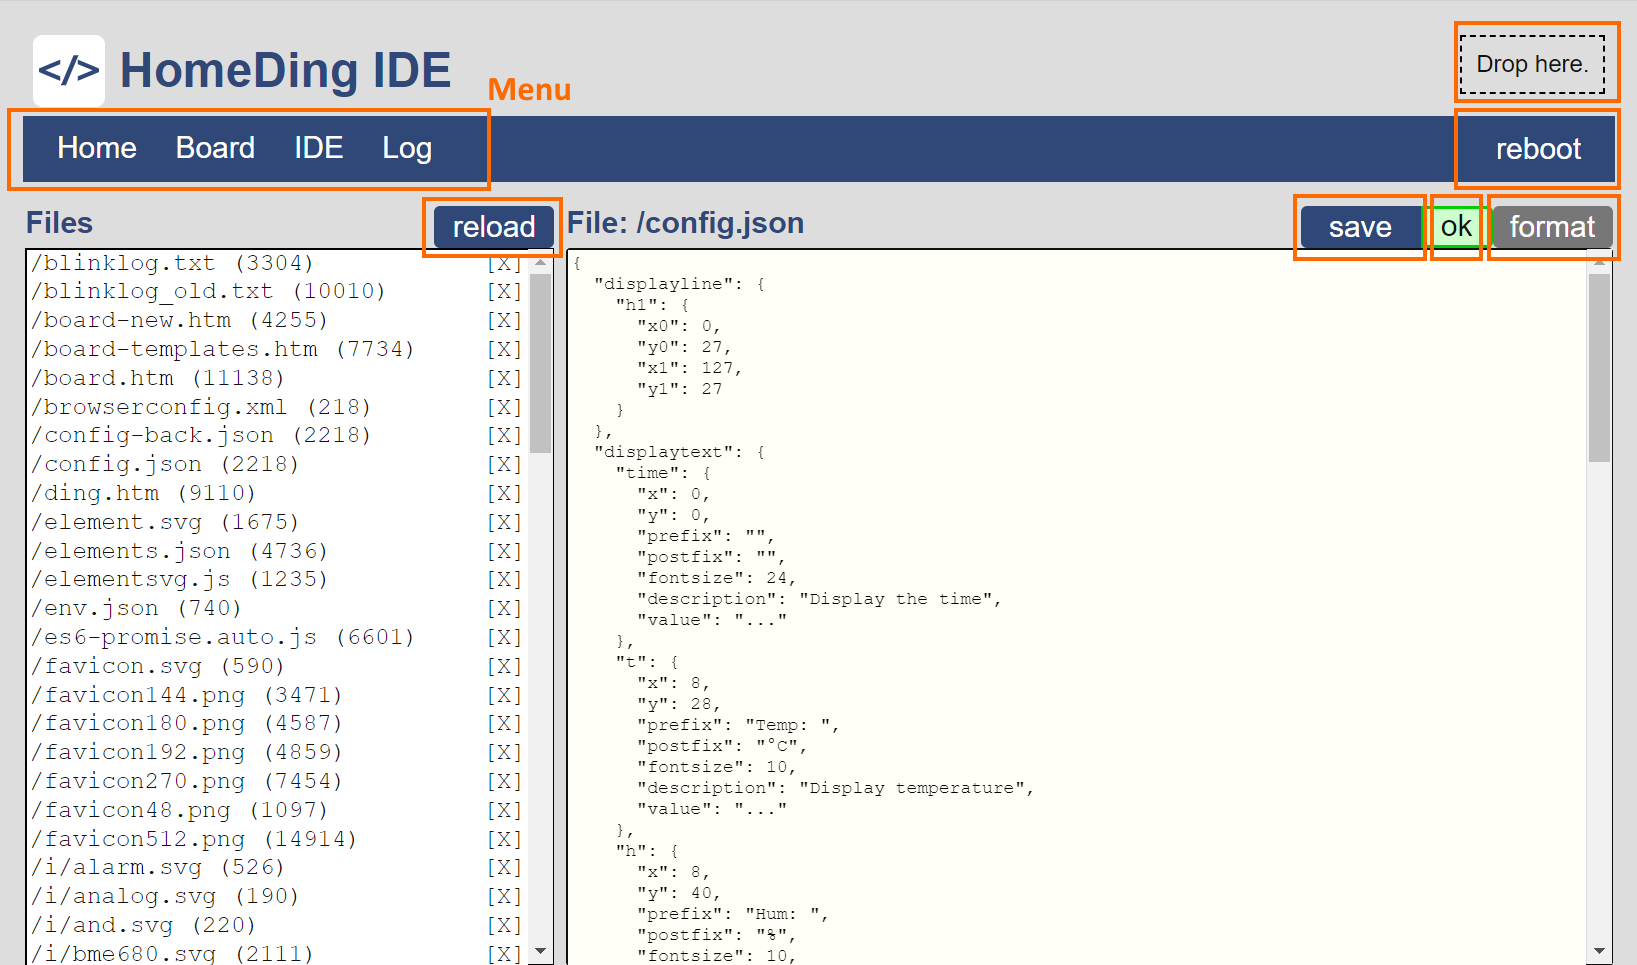
On the left side all existing files can be seen.
On new devices the env.json and config.json files will not exist as they are not loaded and updated when using the Web based update.
Create the env.json file
The minimal file of env.json should contain a device element configuration to define the name of the device on the network.
{
  "device": {
    "0": {
      "name": "newdevice"
    }
  }
}
To create this file
- copy the given JSON definition and paste it into the right field.
- The click the [save] button.
- In the following confirmation box enter the name of the file like: “/env.json”.
You can find specific env.json files for the boards that have been tested.
Elements that are defined in the env.json files are those that are specific for the hardware and do not specify the behavior, like:
device, ota, ssdp, ntptime, displays.
Create the config.json file
The config.json file is created the same way as the env.json file. The minimal content of this file can be empty or a JSON without element definitions.
{}A good starting for a config.json can be found in the stories or the recipes.
See also
You can find more details about the microide features in the Micro IDE documentation.
replace
homedingwith the network name of your device to use this link. ↩︎