Build a Inhouse IoT Air Quality sensor no cloud required
Table of Content
- Table of Content
- Intro
- Supplies
- Prepare Arduino Environment for ESP8266
- Include required libraries
- Customize the standard example sketch
- Upload the web UI
- Add the BME680 Sensor
- Add the PMS5003 Sensor
- Adding some network features
- Adding some logging
- Actions
- Configuration Files
- Links and references
Intro
The quality of the indoor or outdoor air depends on many sources of pollution and also by the weather. This device captures some of common and some of the most interesting parameters: by using 2 sensor chips.
- Temperature
- Humidity
- Pressure
- Organic Gas
- Micro-Particles
The sensors used here are the BME680 for getting temperature, humidity, pressure and organic gas values and the PMS5003 to get density of the micro particles.
By using the HomeDing library it is easy to build a device that is connected to your home Network only and can be reached and controlled by any browser on the network. It comes with a selection of Elements that allow using the most common sensor chips, devices and other services.
It also brings a complete solution for hosting a web side inside device instead of using a cloud based solution to display the sensor data and interact with the device.

Supplies
All you need to build this project is a ESP8266 based board like the nodemcu board and set of sensors to measure the air quality. The HomeDing library used in this project supports some of the common sensor chips for temperature, humidity, pressure and quality. Here the BMP680 chip is used.
- A USB plug and a micro-usb cable for power supply.
- 1 nodemcu board with the ESP8266 CPU.
- 1 BME680 sensor breakout board.
- 1 PM2.5 air particle laser sensor type PMS5003
It is easy to swap the BME680 sensor with a DHT22 sensor as they are also supported by the library among many others.
Prepare Arduino Environment for ESP8266
-
Install latest version of Arduino IDE (currently version 1.8.2).
-
Use Board Manager to install the install the esp8266 support.
A detailed instruction can be found here: https://arduino-esp8266.readthedocs.io/en/latest/installing.html#boards-manager
-
Install the Arduino ESP8266 filesystem upload utility.
A detailed instruction can be found here: https://github.com/esp8266/arduino-esp8266fs-plugin
-
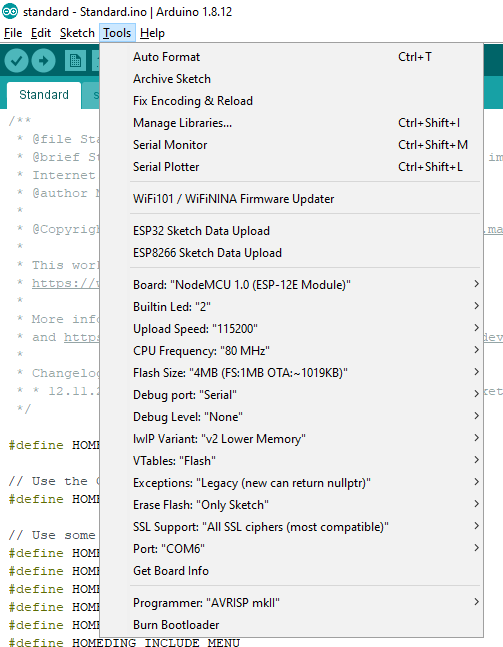
Setup the board options for a NodeMCU 1.0 with 1MByte SPIFFS File System
Include required libraries
The HomeDing library relies on some common extra libraries for sensors and displays to work.
When you install the HomeDing library you will see a popup with these required libraries that can be installed automatically.
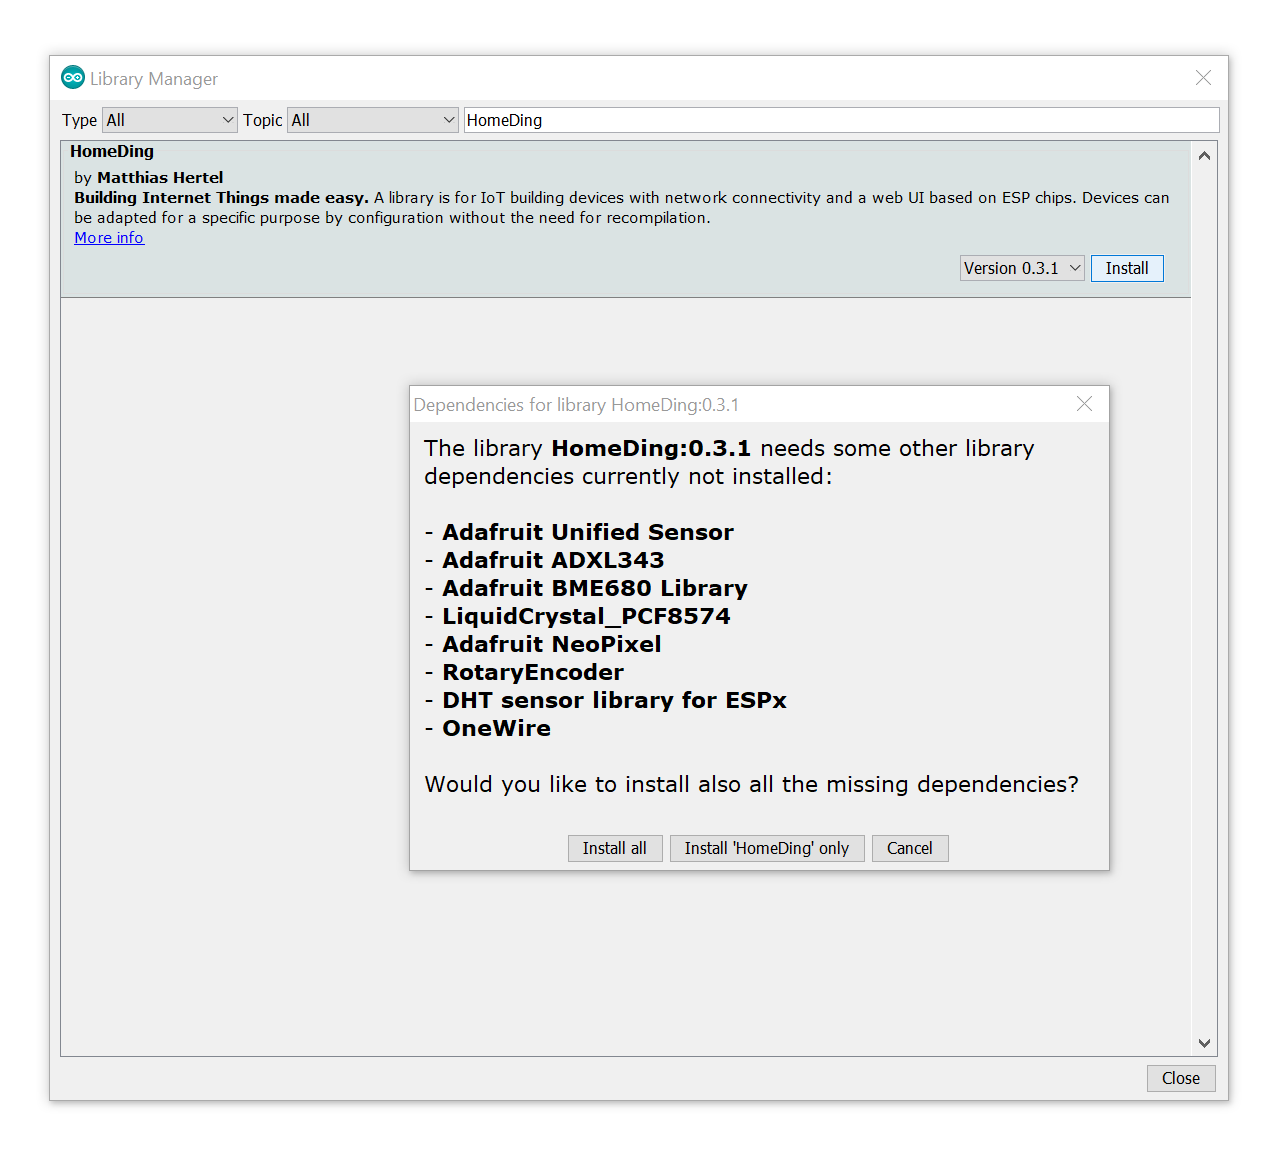
Sometimes (with unknown reasons) the installation of the libraries fails so all the required libraries need to be installed manually.
More details about the required libraries can be found on the documentation website at https://homeding.github.io/elements/index.htm.
This is the list of current required libraries:
- Adafruit NeoPixel
- LiquidCrystal_PCF8574.h
- ESP8266 and ESP32 Oled Driver for SSD1306 display
- RotaryEncoder
- DHT sensor library for ESPx
- OneWire
The PMS5003 air particle laser sensor communicates using a 9600 baud serial line signal. This signal is captured by using the SoftwareSerial library that comes with the installation of the ESP8266 tools. Be sure not to have an older version installed as a library.
Customize the standard example sketch
The Standard Example already includes some of the more common sensors as elements so only some configuration will be required.
This applies to the BME680 sensor that is supported by the BME680 Element.
The PMS5003 sensor is less common and needs to be activated by including the PMS Element into the firmware. This is done by by defining #define HOMEDING_INCLUDE_PMS in the element register section of the sketch.
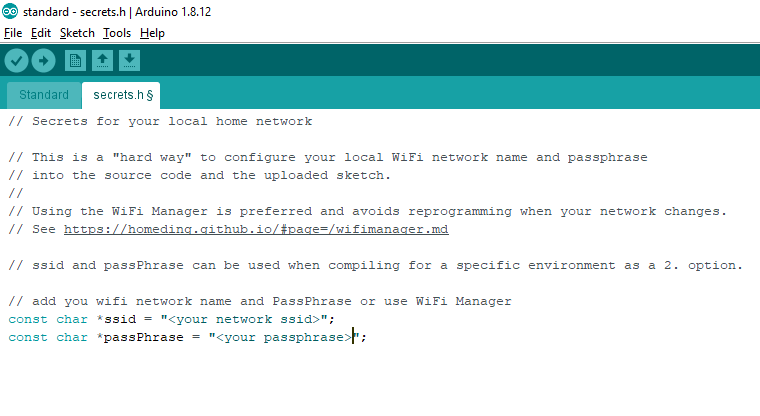
For simplicity on adding the new device to the network you may add the SSID and passphrase of your home WiFi in the secrets.h file next to the standard.ino sketch file. But you can also use the built-in WiFi Manager to add the device to the network without this hard-coded configuration.
Now everything regarding implementation of the sketch is done and the firmware can be compiled and uploaded.
Upload the web UI
The standard example comes with a data folder that contains all file for the web UI.
Before you upload these files you may want to add the env.json and config.json file you can find with this article because this will make things easier.
The content of these files is what makes the IoT device special and behaving as an Air Quality sensor. It is explained in detail in this story.
The use the ESP8266 file upload utility and upload all the files. It needs a reboot to activate the configuration.
Add the BME680 Sensor
The BME680 Sensor is communicating with the board using the I2C bus.
As this is possibly shared with other extensions like other sensors or displays is is configured on the device level in env.json together with the network name of the device. Here is a extracted sample of device and I2C settings:
"device": {
"0": {
"name": "airding",
"description": "Air Quality Sensor",
...
"i2c-scl": "D2",
"i2c-sda": "D1"
}
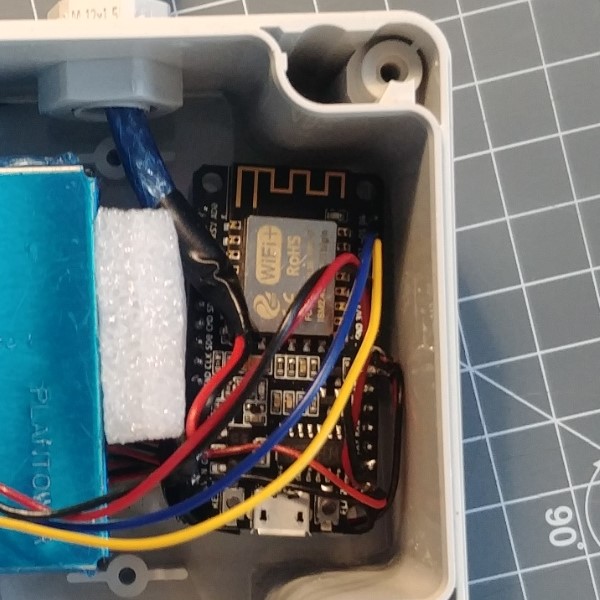
},On the breadboard you can see the connection cables to the sensor:
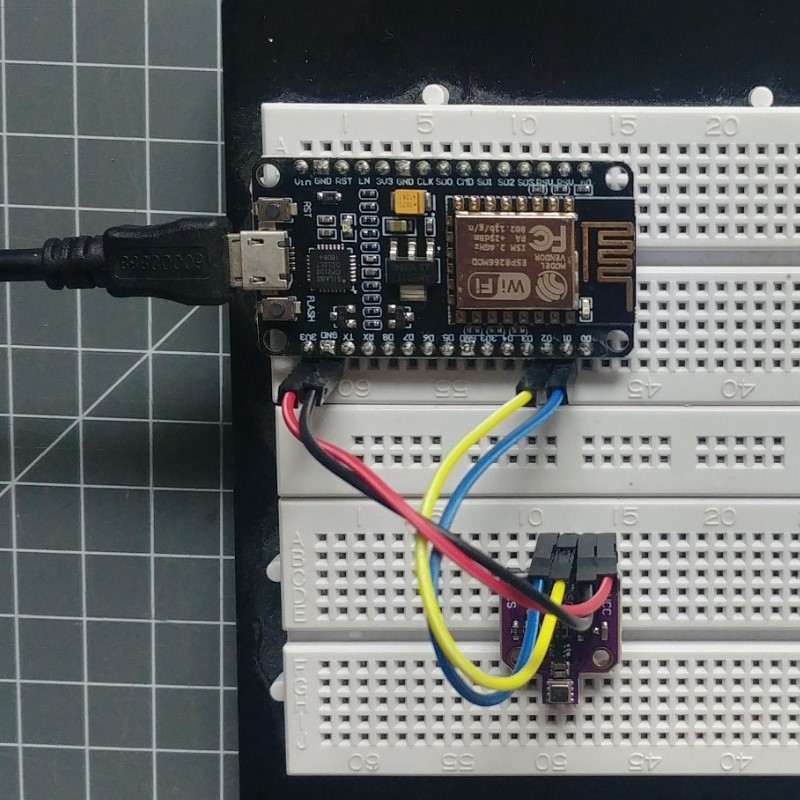
3.3V=red, GND=black, SCL=yellow, SDA=blueThe configuration for BME680 can be used in config.json:
"bme680": {
  "bd": {
    "address": "0x77",
    "readTime": "10s"
  }
}
We will add the actions later.
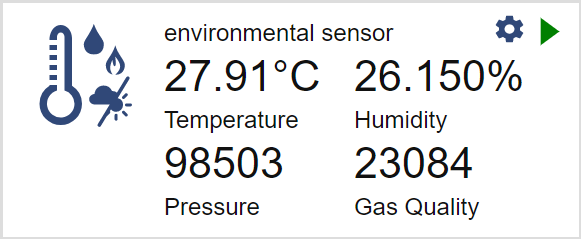
To test the setup just use a browser and open http://airding/board.htm and you will see the actual values of the sensor displayed and they will be updated about every 10 seconds:
Add the PMS5003 Sensor
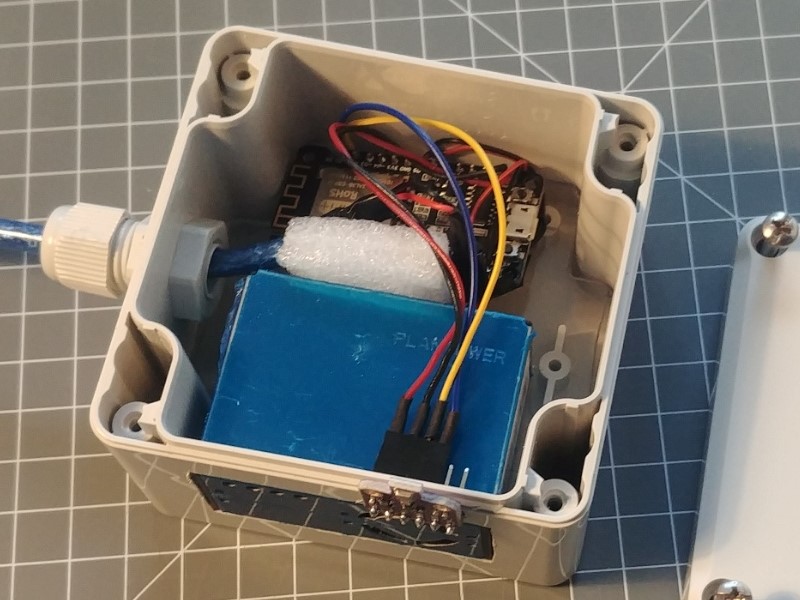
I didn’t got a sensor with a breadboard friendly connector so I had to cut of one of the connectors on the cable use my soldering iron to directly attach it to the nodemcu board. You can see it still on the final pictures.
The power for this sensor must be taken from the Vin that is normally powered by the USB bus. GND is the same but also available next to the Vin pin.
The data from the sensor is transferred in a standard 9600 baud serial format so the rx and tx pins and reading time needs to be configured:
"pms": {
  "pm25": {
    "description": "pm25 particle sensor",
    "pinRX": "D6",
    "pinTX": "D5",
    "readTime": "10s"
  }
}
We will add the actions later.
To test the setup again just reboot the device and use a browser and open http://airding/board.htm and you will see the actual pm35 value of the sensor displayed and they will be updated about every 10 seconds but this value is normally not changing often.
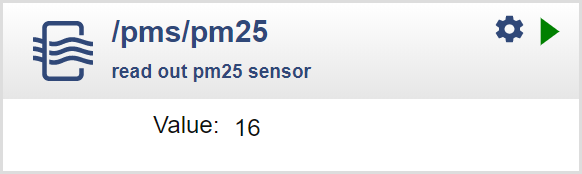
You can get higher values by placing a candle light next to the sensor as a candle produces much of these particles.
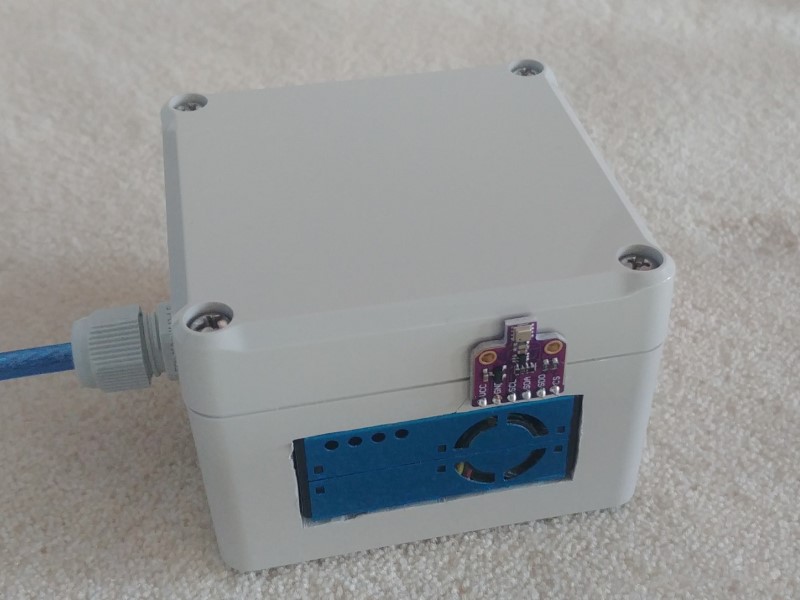
Now you can put everything in a nice housing because all the other configurations and even software updates can be done remotely.
Adding some network features
The following configuration extract in env.json is enabling
- updating the firmware over the air
- allows detecting the network using the SSDP network protocol and retrieves the current time from an ntp server.
{
  ...
  "ota": {
    "0": {
      "port": 8266,
      "passwd": "123",
      "description": "Listen for 'over the air' OTA Updates"
    }
  },
  "ssdp": {
    "0": {
      "Manufacturer": "yourName"
    }
  },
  "ntpTime": {
    "0": {
      "readTime": "36h",
      "zone": 2
    }
  }
}
You should adjust the timezone to your location. If you are in doubt you can use the web site https://www.timeanddate.com/ to get the offset from UTC/GMT. “2” is right for Germany summertime.
You may also adjust the ota password after reading the instructions regarding the save mode in the documentation at safemode .
After a restart you may find the airding device on the network and after getting a reply from the ntp server the local time is available.
Adding some logging
Just the actual values may not give enough so some more elements can be used.
For this story the Log element and the NPTTime Element are used to record the history of sensor values in a log file and the Web UI card for this element can display it as a graph.
The following configuration creates the 2 log elements for gas and particles:
{
  "log": {
    "pm": {
      "description": "Log of pm25",
      "filename": "/pmlog.txt",
      "fileSize": "10000"
    },
    "aq": {
      "description": "Log of gas quality",
      "filename": "/aqlog.txt",
      "fileSize": "10000"
    }
  }
}
Actions
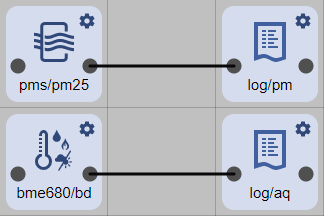
Now we need to transfer the actual values to the log elements by using actions. The actions are using an URL notation to pass a kay and value to the target element. Many Elements support emitting actions on certain events that happen like capturing a new sensor value.
Actions are configured at the element that emits actions 2 entries are required:
- The pms/p25
onValueevent sends the actual value to the log/pm element using a value action. - The bme680/bd
onGasevent sends the actual value to the log/pm element using a value action.
{
  "pms": {
    "pm25": {
      ...
      "onValue": "log/pm?value=$v"
    }
  },
  "bme680": {
    "bd": {
      ...
      "onGas": "log/aq?value=$v"
    }
  }
}
Now all the elements are configured like this:
Configuration Files
env.json
{
  "device": {
    "0": {
      "name": "airding",
      "reboottime": "24h",
      "description": "IoT Air-Ding monitoring air quality",
      "logfile": 1,
      "led": "D0",
      "button": "D4",
      "i2c-scl": "D2",
      "i2c-sda": "D1"
    }
  },
  "ota": {
    "0": {
      "port": 8266,
      "passwd": "123",
      "description": "Listen for 'over the air' OTA Updates"
    }
  },
  "ssdp": {
    "0": {
      "ModelUrl": "https://www.mathertel.de/Arduino"
    }
  },
  "ntptime": {
    "0": {
      "readtime": "36h",
      "zone": 1
    }
  }
}
config.json
{
  "pms": {
    "pm25": {
      "description": "Air particle sensor",
      "pinrx": "D6",
      "pintx": "D5",
      "readtime": 300,
      "onvalue": "log/pm?value=$v"
    }
  },
  "bme680": {
    "bd": {
      "description": "Environmental sensor",
      "readtime": "300",
      "ongas": "log/aq?value=$v"
    }
  },
  "log": {
    "pm": {
      "description": "Log of pm25",
      "filename": "/pmlog.txt",
      "filesize": "10000"
    },
    "aq": {
      "description": "Log of gas quality",
      "filename": "/aqlog.txt",
      "filesize": "10000"
    }
  }
}
Links and references
- HomeDing Source Code Repository: https://github.com/HomeDing/HomeDing
- HomeDing Documentation: https://homeding.github.io/
- Standard Example
- BME680 Element
- PMS Element
- Log element
- NPTTime Element